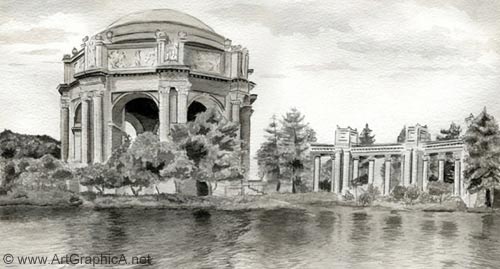
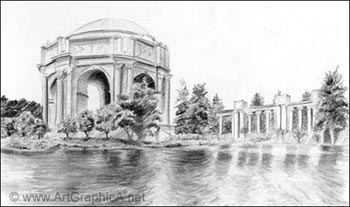
13.5" by 7.5", pen and ink washes on Bockingford Watercolour Paper
The Romanesque Palace of Fine Arts can be found in San Francisco. Built in 1915 it is an interesting piece of architecture, juxtaposed by greenery and water.
Although a romanticised culimination of Roman and Greek ideas, the palace creates an interesting and solid form amongst its surroundings. I have chosen it for the subject of this medium as it contrasts a number of elements - architecture (and the perspective that entails), vegetation, and water.
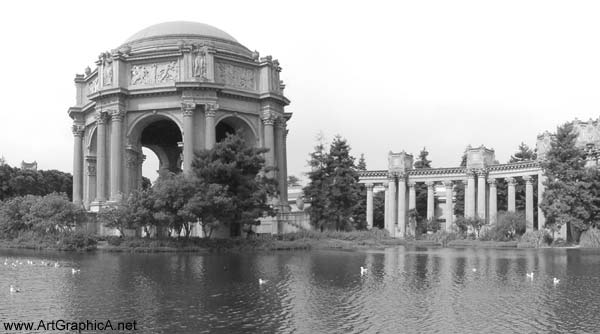
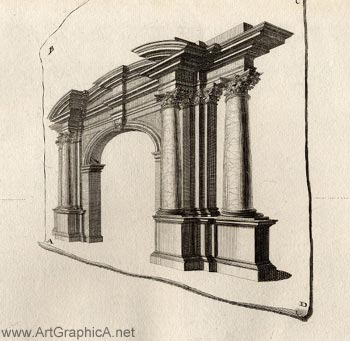
Brief analysis of photograph source
Photo Reference
There are a few things to bare in mind when working from a photograph. Architecture in particular (or really anything that features straight lines), can be distorted by the curvature of the camera lens. Photos are often prone to bleaching the sky, although in this case the San Francisco sea mist had whitened the sky and left it rather featureless (as you can see in the video at the top of this page). Because a camera catches more detail than the human eye, it is also advisable not to obsess too much over little fickly details. For example, at first glance the water looks horrendously complicated, full of haphazard ripples. You will see in a later video how this can be simplified and an approximation created in no time at all.
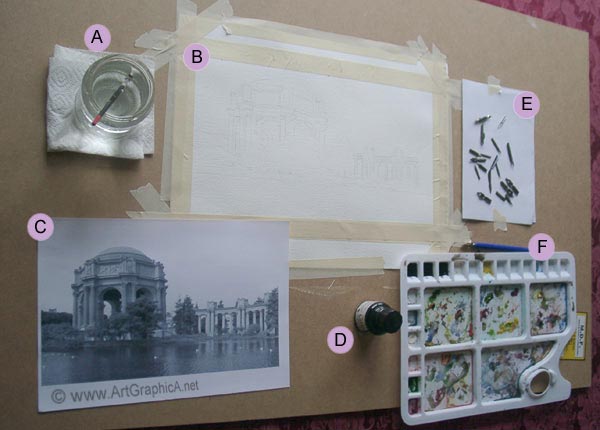
Art Materials
A - Water and watercolour brush
B - Drawing on Bockingford watercolour paper (presoaked)
C - Print of photograph
D - Waterproof Black Ink
E - Assortment of pen drawing nibs
F - Watercolour palette (wells used to hold ink - water added as necessary).
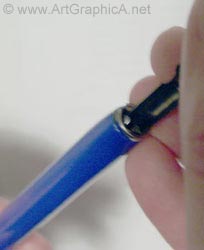
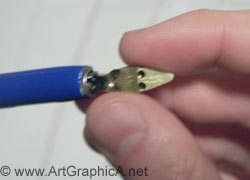
Pen Holder and Nibs
The pen nib slots down the side of the pen holder. If necessary, the metal inside can be pushed out to provide more grip.
The pen reservoir slips onto the nib. If it is too loose or too tight, the pins can be adjusted. Slide the reservoir down so about 2mm of the pen nib is exposed.
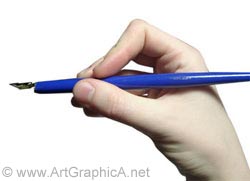
Once assembled, the pen can be used in much the same way as a pencil.
The video below demonstrates how to assemble the pen nib and reservoir. If the ink does not flow well, you may have to adjust the reservoir to encourage the ink to come down to the tip.
As I do not often wish to use pure black ink straight out of the bottle, I dilute it with a little water, held in the well of my watercolour tray, and use a paintbrush, brushing it into the side of the pen to fill up the reservoir.
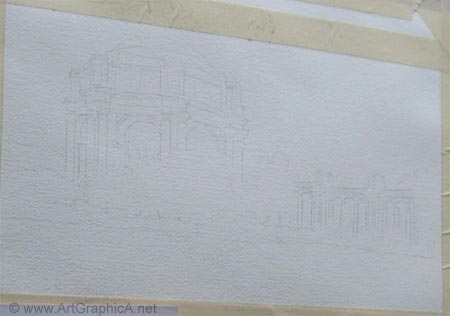
Sketch
Often before embarking on a drawing, I will produce a small sketch of the subject. The initial sketch allows you to be much better aquainted with the scene, and resolve some of the issues involved with drawing. The graphite sketch below, 20cm by 12cm, gave me an improved understanding of how to tackle features like the water which came across as a little too turbulent in the sketch.
With an H grade pencil I take my time to mark out the architecture; a misaligned tree is something easily unnoticeable, but a building that obeys the laws of perspective can look wrong if just a few lines go astray. I used a ruler for the vertical lines, and the horizontal lines of the palace. Most of the vanishing points lay some distance off the paper, so to a certain extent it is approximated. Three main sides of the palace are exposed to the viewer and I worked from left to right, trying to ensure each section is complete before I moved to the next.
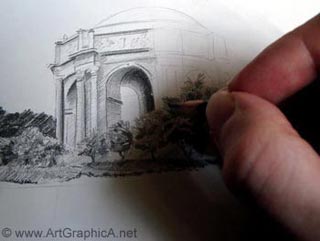
Using the pen much the same way as the pencil, I go over my pencil lines, using a more concentrated mix of ink where the lines are darkest, and using a lighter, watered down mix for lighter areas, such as the curvature of the roof. All the work is really done in the initial pencil drawing, and unless your ink gets carried away and drips onto the page (a potential disaster!), it is quite an easy stage. As I want the architecture to have most of the hard edges, and a feel of solid construction I use the pen and nib to outline all the main features, but go very sparingly on vegetation where the looseness of a brush will contribute to a looser feel, and I leave the water altogether.
The next stage is to add shading, and again this is a fairly straightforward part. The ink reacts much like watercolours, and you may find the ink does not always want to fill the texture in the paper - loading the brush with more ink or water usually resolves this problem. The ink is fast drying, and once it is dry, it is there to stay. For this reason I find it much easier to build up tones by layers, allowing each layer to dry before I apply the next. I will apply anything up to about five layers until I am happy with the tonal contasts. When first working on the building, I was quick to add the darkest parts of the arches as a visual cue to base all other values upon. As the lines are well established with the pen, shading is much like a child filling in his colouring book - try not to go over the lines!
Trees and Vegetation
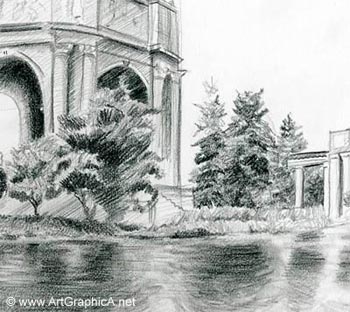
A different piece of vegetation simply requires a different form of 'texture' to represent it. For example the distant trees on the far left of the drawing are built up with tiny stippling motions of the brush - i.e. taking a small watercolour brush and dabbing lots and lots of little dots onto the paper. The evergreen trees feature needles instead of leaves, and so looking at my source I mentally try to feel the direction in which the branches spread out and approximate a suggestion with the brush. If you work fast, the brain doesn't have much time to analyse, and I find my vegetation looks better for it - it has that looseness I'm after. I build up the tones with a few layers, each layer progressively darker than the last.
Water
I have to confess that I haven't often attempted to simulate water; studying water in life is difficult due to its dynamic nature, and I find in such instances, photographs provide the better source. Before I commence I know that the water must be soft, and provide a balance to the hard-lined architecture above it, therefore I decide to use the wet-in-wet approach. I also make mental note of the how everything above the water will be reflected down below, with the darkest reflections capturing the shadow of the arch, and the lightest areas being that which reflect the sky (far left), and the colonnade reflections on the right.
To work wet-into-wet, you have to work fast, which is beneficial in preventing the mind from trying to disect and process every little detail and ripple. I begin by wetting the water area with clean water and a clean flat watercolour brush. Initially I want to kill the whiteness of the paper and so apply a very light ink wash to match the lightest tone I want in the water. Whilst the paper is still quite damp I tone the overall paper in accordance to where the reflections lie, knowing that the edges of my brush strokes will remain soft. If you were to try the same procedure on dry paper you would need a clean wet brush and swiftly dab at the edges to ensure it didn't produce a hard unwanted edge - not as easy or as practical to execute. If you find your paper is drying on you too quickly and hard edges are appearing, leave the whole area to dry, and re-wet it before carrying on. Once the general tone is in place, I use my smallest watercolour brush and rapidly mark in the suggestion of ripples. It is much the same process as producing the suggestion of vegetation, except most of my lines run relatively parallel, curving subtly in places to leave the impression of a gentle breeze blowing on the surface. Again, with the ripple suggestions, speed stops the mind from too much analysis and makes light work of a complicated subject that you could labour many hours over.
Sky
There is no sky in the photographic source, and although I like the sense of light, it did leave the drawing slightly bland. The sky needed to balance with the water - i.e. it must be soft, allowing the eyes attention to focus toward the middle of the paper. The same wet-into-wet procedure as used on the water, was applied to the sky. Again I begin with a light wash to effectively kill the white of the paper just a little. If you observe the sky outdoors, you will notice it is lighter towards the horizon and deepens in tone as the atmospheric depth intensifies the higher up you look. My initial decision was to deepen the tone towards the top of the paper, and use a tissue, to reclaim the whiteness of the paper and create an idea of clouds. However, in the end I ended up using the tissue to stop the drips of an over-saturated brush, not helped by the steep angle I was working at, and decided to add a little more mood to the drawing by marking in darker clouds with the flat watercolour brush instead. Do not forget that clouds follow the rules of perspective - by making my clouds smaller and flatter as they come down to the horizon it provides the sense of perspective needed to fool the eye into thinking there is something three-dimensional about the scene. After marking in the clouds my paper is already starting to dry and so I take a clean brush and some clean water, and dab a little at some of the cloud edges to soften and blend a few areas, giving the suggestion of a little more wispy cloudness to these abstracted blobs of ink.