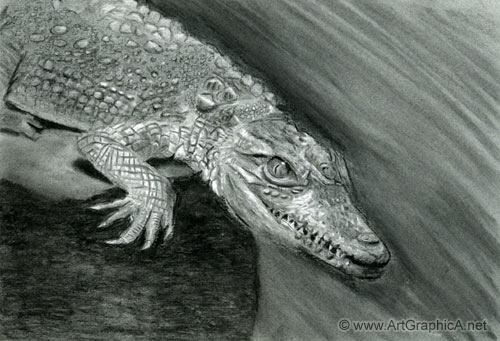
Alligator - Charcoal and White Pastel Demonstration
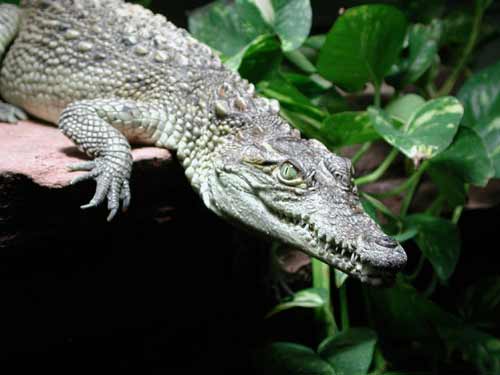
I have it on good authority that this is an alligator and not a crocodile, the name derived from El Lagarto (The Lizard), and reaching anything up to about 16 feet, with a mouth comprised of up to eighty or so teeth.
In this demonstration, we will be looking at how to use charcoal and white pastel to render the textured reptilian skin on toned paper and making use of a rubber tipped colour shaper tool, which can blend smaller areas where fingers would be too clumsy.
Photo Reference : Courtesy of Hannes Niederglatt Keller, Visipix
Materials
A4 sized Canson Pastel Paper (greyish-green mid-tone)
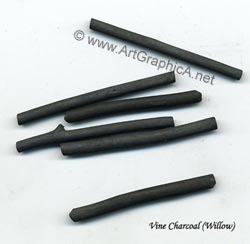
Vine Charcoal
Charcoal Pencil
White Pastel Pencil
Pastel Blender
Pastel Blender (aka Colour Shaper)
This rubber tipped tool can be bought from art shops in various sizes and shapes. Fingers can be too big and clumsy at blending certain areas, whereas tools like this can get into the nooks and crannies, and blend the charcoal and pastel as required. I use a number 2 Clip Round, soft.
Vine Charcoal
Vine charcoal is the soft, crumbly and brittle, twig-like variety, not to be confused with compressed charcoal. It is extremely easy to erase and make corrections with.
Charcoal Pencil
A charcoal pencil allows for some finer details, and is slightly darker in tone than the vine charcoal. The white pastel pencil looks and functions in a similar way.
Drawing the Envelope
The beauty of vine charcoal is its ability to be erased, making the alteration of mistakes very easy to achieve.
Simplification is always the way to approach a drawing, if you can reduce your subject to a series of shapes and angles, you at least have something on your paper that can be reworked if deemed necessary. Finding a starting point can be the hardest part to any drawing, so if you immerse yourself quickly, you will soon have that part of things underhand.
The toned paper acts as a middle tone, which makes shading easier, and allowing us to concentrate more on highlights and shadows. With this said, a little shading does help define the alligators form, and better to do this early on rather than trying to shade around all the bumps and textured reptilian protrusions.
The Eye
Alongside the set of teeth and the clawed foot, the eye is a strong focal point, and so to complete it in the initial stages sets a marker from which the rest of the drawing can be based.
Marking lines with the charcoal pencil, leaves a hard edge. It is important to have some hard edges in this area to provide extra focus, but even hard edges consist of graduations of hardness, and I therefore find it preferential to go over the lines with the blending tool. The shininess of the eye is achieved primarily through the highlight, creating that impression of a reflective surface. In order to further contrast it against the hard scaliness of the body, the eye as a whole must be blended to achieve a smooth graduated tone, following the form of a spherical object.
Creating the texture
To replicate everything seen in the photograph would be extremely laborius, and would demand a great deal of concentration, I therefore prefer a sort of impressionist technique of creating a bumpy surface that follows the basic form, but does not rely extremely heavily on the original photograph.
To achieve this, I set down little marks with the vine charcoal, which will initially look wrong, because they are far too dark. This is where the blender can be used to smooth out and lighten the tone. I repeat the process a couple of times and then add some highlights with the white pastel pencil, and again use the blender very lightly just to kill areas that are too bright, and to blend the darker areas up into the edges of the white so there is a little continuity and softness between them. Where there is less blending, there is more contrast, which can be used to suggest a more textured piece of skin.
Finishing the Head, and including the Teeth
The texture of the head, is completed in the same way as the previous stage, making plenty of use of the blending tool. It doesn't take long before the rubber tip picks up the charcoal, and you can use this to mark in little features, textures and tones, pushing the edges of the tool directly onto the paper.
The teeth are one of the defining features that can be used for identifying crocodiles from alligators. With the black void of the mouth already marked in, the white pastel pencil makes easy work of tooth suggestions. Some of the teeth edges will reflect the light a little more intensely than others, and so I apply a little more pressue down some edges of the teeth to add a little more interest. The charcoal pencil is used to intensify the dark areas between the teeth, as this is where some of our deepest shadows are featured.
Toning and Scaling the Main Body
Although the paper tone defines much of the alligator, there were areas we shaded in the initial stages, and there are areas of highlight, that are better to suggest now before attempting to put the cracks and bumps in.
To make light work of the scales on the underside of the belly I found it easier to mark in lines following the general form in a grid like fashion. The area in actuality is not so grid-like, but rounded, and so using the grid as a guideline I use the blending tool to round off the corners. Another means to blend the charcoal is to rub the white pastel pencil over the area, but with very little presure. Where a more intense highlight is required, simply apply more pressure.
Background
We can't leave our alligator suspended in mid air, and as in the original photograph, he stands out better against a dark background.
I start with the vine charcoal, as it is easy to correct if need be, but the pencil is more stable, darker and less prone to smudging. It does require blending to fill in the tone evenly. The area adjacent the rock relies solely on the vine charcoal and a tissue to smudge and blend, and is completed quickly with a couple of layers.