An apple. Yes, very original I know! Yet an apple has form, texture, they’re cheap to buy, easy to set up and you can eat them afterwards (or during!) – did I mentioned they're nutritious too? All in all there are a lot of benefits to drawing organic objects like fruit.
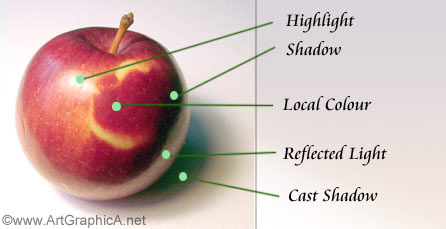
You can think of an apple a little like a sphere - you’re likely to have a spotlight where the apple is brightest (most reflective), one section will recede into shadow as the other comes out into light, and if you look carefully you should notice reflected light in the cast shadow (see photograph with labels below). Try to work from life as opposed to a photograph as you will have a better appreciation of form.
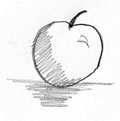
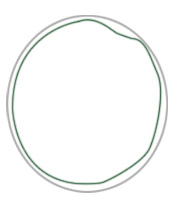
If drawing is all very new to you, you might be tempted to do this.
Resist!
Unfortunately there is no magic spell to erase the familiarity of an apple from your mind, so you will have to concentrate very hard, and all the while keep asking yourself, “am I drawing what I am seeing, or am I drawing what I think it should be?” If you have deviated to your own conception of an apple (and that isn't to say you have to adhere extremely rigidly to what you see), take a rubber and rework it, or start again!
When I said think of your apple as a sort of sphere, I didn't expect to photograph one quite so spherical! Regrettably it was the only one left in the fruit bowl that I hadn't eaten, although my drawing perspective is at a slightly different angle to the camera's and really it is not quite as spherical as it might appear above. As discussed in the photography section, shadows tend to be too dark in a photo, which is why life drawing can be beneficial.
For these two sketches I use an H and a 2B pencil on an A4 sized sheet of sketching paper attached to a thin sheet of hardboard for support.
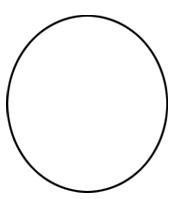
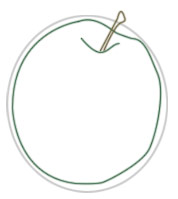
Begin with a sphere.
Chisel the sphere to conform a little more to an apple shape.
Add the stalk and indentation it protrudes from.
Visualise the apple as a three-dimensional object. When it comes to shading, follow its contours to give that 3D appearance.
Outlines
Begin your apple with a fairly light touch; drawing rounded objects freehand is easier said than done. I begin with the outline, add a little circle so I know where the highlight will be positioned and then begin with the top of the apple. Look for little details such as the way the top of the apple contours down into the indentation where the stalk protrudes, also make note of the shadow of the stalk. Shadows help give objects a sense of place, and when they are forgotten they can take a lot away from a potentially good drawing or sketch.
Shading
It is important you follow the form of your object when shading. If you put the darks in the dark areas and the light in the light areas, this alone will do it, but to create further definition and a better sense of gesture and dynamism, curving your lines to the shape of the apple will significantly improve things.
I grip the pencil in different ways, using a low angle of tilt and an overhand grip for the shadow area where I want more pressure. Change your grip depending on the comfort of your wrist, and the direction of your shading.
So far we have followed the contours of the apple in a vertical plane, top to bottom, but you may also want to mark in a horizon plane suggesting the curvature of the apple in the other direction.
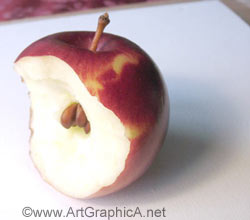
When you have finished the apple in its unspoilt state, take a big bite right down to the core; avoid eating the pips - we want to draw them!
Apple with Bite Mark
Our apple is still the same apple, so when you make the initial outline, draw it as though the apple was there in its entirety; you can then mark an elliptical sort of area to represent the incurvature of missing apple (now happily digesting and contributing to making you a fit and healthy human being), and have a basis from which you can chisel away and redefine its shape.
Everything else is much the same. I lightly mark in the lines that define the vertical curvature of the apple, and these directional contours can be followed when shading to give the apple its form. The pips are inserted to fill the void of the bite mark.
If any of your areas look lost amongst the shading - for example, say you begin with the stalk and add more shading to the apple and as a consequence your stalk is difficult to discern - go back over that area with a darker line, redefining the edge so it has its clarity once again. However, resist any temptation to darken all your edges as this will only contribute to a cartoony feel.
Shading
Shading follows the same format as before. In darker areas where more pressure is required, I adopt an overhand grip and use the edge of the pencil. Previously, I had exposed the graphite of the pencil using a scalpel and this will give you a wider edge to work with and makes the conventional pencil a more effective sketching implement than a mechanical one.
The exposed apple does have form and some shadow, although in my drawing this area is exposed to the brightest lights. Approach it with a light touch, though if you spend too long sketching, the core will soon darken and brown. Notice that my pips begin to lose a little of their definition when I come to shade areas of the bite mark; they are given their focus and dominance again by reiterating the outlines - they need a sharper edge to stand out but if you overdo this, it is possible to make them too dominant. Striking the right balance is just a question of experience. You may notice I shade the outline of the apple that falls into the area of shadow with more pressure then that in the lighter area.
 An apple. Yes, very original I know! Yet an apple has form, texture, they’re cheap to buy, easy to set up and you can eat them afterwards (or during!) – did I mentioned they're nutritious too? All in all there are a lot of benefits to drawing organic objects like fruit.