Wolf, Wildlife Acrylic Art Demo |
||||||||||||||||||||||||||||
Acrylic Painting Lesson
The wolf is probably the most documented of all animals, and remains the sole ancestor of the domesticated dog. Their numbers have been reduced in size to about one third, due to human intervention and fear of attacks in livestock. The wolf's winter fur is very dense and fluffy, with short underfur and long guard hairs (the top most layer - coarser and straighter). Some of the fur is lost in the springtime. Painting this fur in detail is a meticulous labor of love, and the artist should take care to search for patterns, groupings and shadows to achieve the maximum realism. Rod Lawrence has a degree in fine arts from the University of Michigan, and has been working as a professional artist ever since. The artist remains in Michigan, in a log cabin overlooking the Manistee River. This demonstration is from the book, The Art of Acrylic Painting (Collector's Series), published by Walter Foster Publishing Inc. Reprinted with permission of the artist. CROPPING INI especially liked the angle of this wolf's head and the bright backlighting. When cropping in on the head, I left enough negative space around it to close in on the wolf without confining it too tightly. 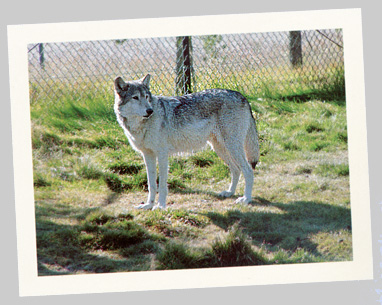 Step OneFirst I mix the overall base color for the head using cerulean bue, white, and smaller amounts of burnt umber, violet, and ultramarine blue. For the background, I create several values using many different combinations of burnt umber, cerulean blue, ultramarine blue, white and violet--sometimes adding yellow ochre and cadmium yellow light. I apply these mixes wet-on wet, blending as I paint. 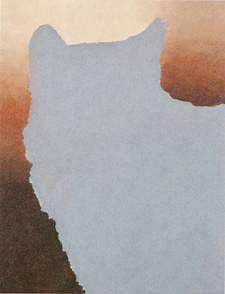
Step TwoNow I transfer the main lines of the background branches from my sketch to the painting, beginning with the background mixes from step one. I apply washes of both lighter and darker values to soften the edges and slowly build up the foliage forms. Then I use a darker value on the area just to the left of the wolf, and I apply both light and dark values to the areas above and to the right of the wolf's head. In the lower-left corner, I start to add some lighter value "holes" (the negative spaces) to the background. 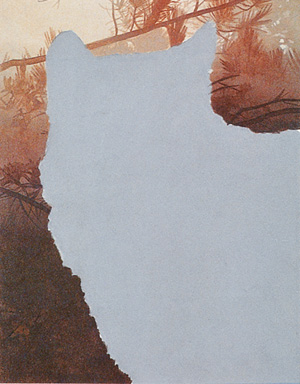
Step ThreeNow I wash in the background lights using a mixture of white, yellow ochre, and orange. I build the lightest areas using white mixed with yellow ochre, cadmium yellow light, and cerulean blue. Then I transfer the facial and fur details from my sketch, painting them with a slightly darker value than the base color; I also build up the eye and nose darks, applying several washes. And I add fur details with a value in between the base color and the darker values. 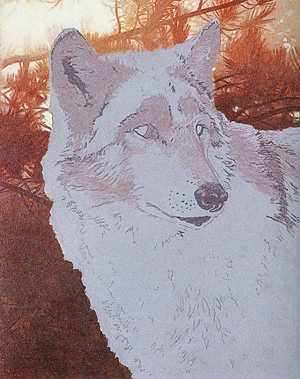
Step FourWhen painting the lightest areas, I use thin washes and slowly build my paint into thicker layers. Then I lay on a darker value to create depth, indicating deeper areas of fur and dark markings. When painting fur, look for clumps of hair as well as color patterns. Fur varies in length and color, and it tends to clump in areas where it is thicker or where it is constantly compressed by movement. Take the time to really see how the clumps overlap, shadow each other, and weave in and out. This will help you paint fur more realistically. 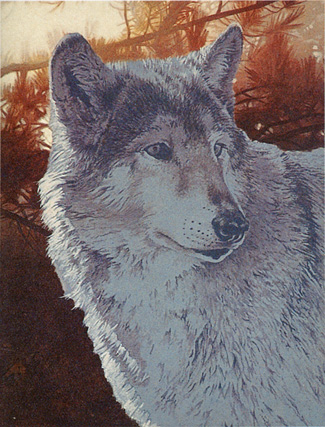
Step FiveNow it's time for color washes (see the samples below), which will enhance the wolf and begin changing the overall look of the base color in some areas. I use a lot of water, treating these mixes like subtle watercolor washes. When dry, these colors will look darker than they do when applied, so you must use some restraint when painting them. This wolf is primarily a grayish-white, so I do not want to add too much color to the body. 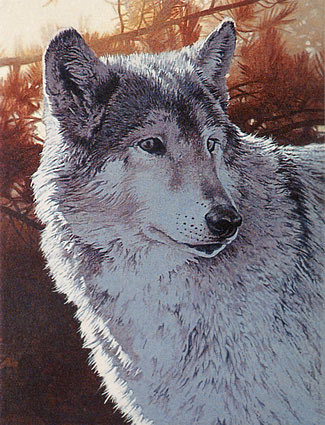
Step SixI establish the eyes with yellow ochre and add a cadmium yellow light wash around the wolf to warm the highlights. Then I paint the next darker value, adding cerulean blue where I want a more grayish-blue and adding more burnt umber where I want more intensity and warmth. 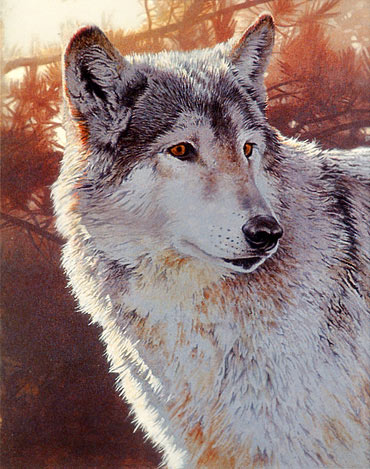 Step SevenNow I've finished with the darker values. Next I apply yellow ochre washes to the head and chest, sometimes adding burnt umber and cerulean blue. For the eyes, which need subtle washes to make them look more realistic, I also add a tiny bit of white and cadmium yellow light. 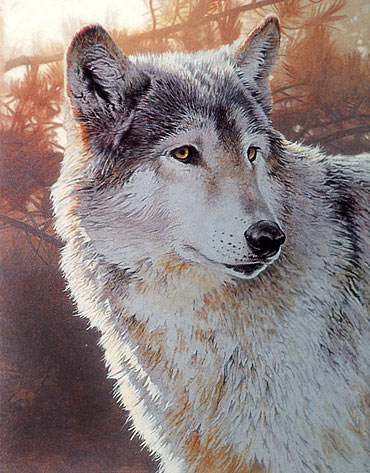 Step EightFor more contrast, I emphasize the eyes, nose, and ears with a mix of cerulean blue, ultramarine blue, burnt umber, and violet. I start the wash above the eyes and between the ears, continuing over the base of the ear on the left. Next I use thicker paint to construct the darker areas. I continue adding the darker value throughout the wolf's head, applying washes for small changes and several coats of paint to cover really dark areas. Then I mix my darkest value--burnt umber, ultramarine blue, and violet--and apply it ovoer the last wash. 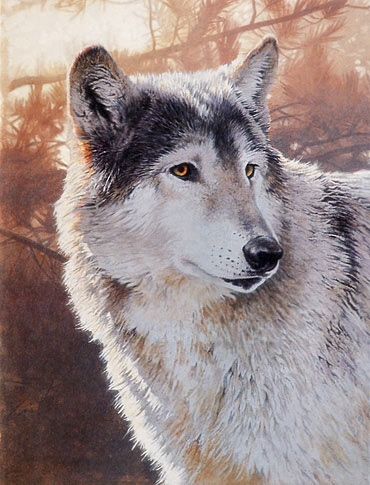 Step NineWith a cerulean blue, yellow ochre, violet, and white mix, I punch up the detail of the fur tips around the eyes, in the cheek and muzzle, and on the chest. Next I use white with a hint of violet to paint the backlit edges, starting with washes and then switching to thick layers of paint. I drag the tip of my round brush into the background to create the finer hair highlights. Next I add the final details, beginning with washes of white tinted with yellow around the left ear. I also paint some darker and lighter fur in the cheek and throat to emphasize contrast. I apply a bluish-purple tint on the nose; then I stroke in the fine, delicate whiskers. 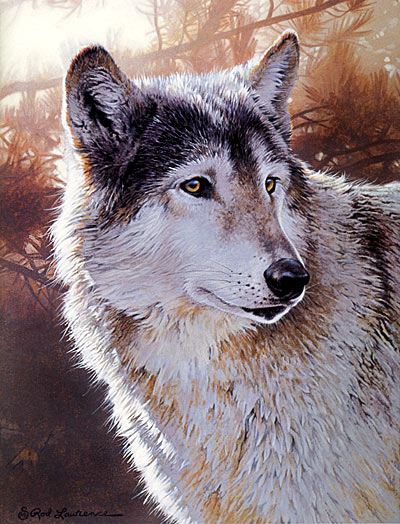 To see a close-up of the wolf's ears and facial details click here Visit Rod Lawrence
|
||||||||||||||||||||||||||||
Acrylic Art Lessons
Site Navigation |
 Acrylic paints are a fast drying medium, and in this wolf painting lesson, blending techniques are required, mixing wet into wet. Should you find the paint dries too quickly, it is possible to add a retarder available from most major manufacturers. Working with thick paint can also help.


