How to Paint a CatOil Painting, Free Lesson |
|||||||||||||||||||
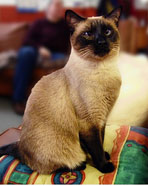
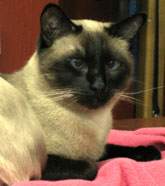
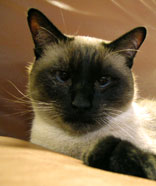
Siamese Cat Demo, Easy Oil Painting TechniquesThese are the three photographs of a Siamese Cat name Siegfried and the owner asked me to paint an original oil portrait – a birthday gift that will last forever. Good reference photographs are important to capture the likeness of the model. Let’s begin the challenge!
Sketching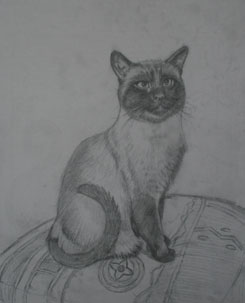
Sketching is the backbone of the painting, failing to be precise in this stage will suffer retouching again and again in the following stages. Precision in the early stage will merit all the trouble of minimizing the errors, the draftsmanship of the subject. The tone values will be rendered and will forecast the result of your painting when seen in black and white. I use an ordinary HB pencil in outlining the drawing and add tones to where you will drop the values of the next coloring stage. After the sketch is completed, I lightly spray with fixative to protect the pencil from smudging. 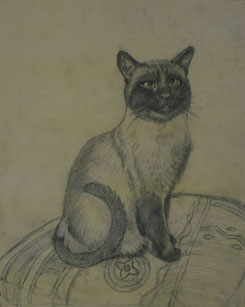
The Ground ColorGlaze the whole canvas with the subject’s middle tone. As the cat has a pale yellow ochre (acrylic), it dries quickly. Again, it protects the drawings from smudging and eliminates the brightness of canvas. It helps also to close the pores of the canvas in which sometimes you will leave small dots of whites. 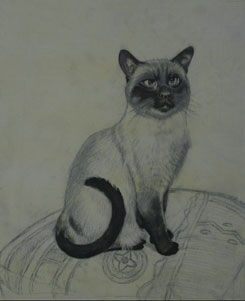
Blocking and BlacksOil painting begins. I start painting the darks by mixing burnt umber and vermilion and cobalt blue. With this three-color combination, softer blacks are created, rather than using solid ivory blacks that create unevenness and holes on the canvas. However, solid ivory blacks give depth when used in the pupils of eyes. Blocking determines the weight composition of the lowest value. 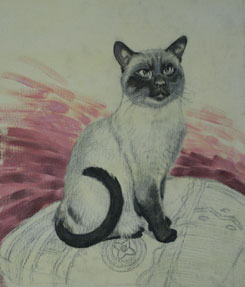
Painting the BackgroundAnticipation of color contrast is also important and forecasting that in the end of the painting session the colors will be harmonized and let the main subject stands out. I choose hot colors for backgrounds and balance them with harmony cool colors of blue-greens, repeating the colors from the pillow. Color BalanceThe value of color plays the mode of the whole painting. It gives expression. Hot colors focus the eyes; and to balance the breathing, cool colors minimize their intensity. * Hot colors: red, orange and yellow. 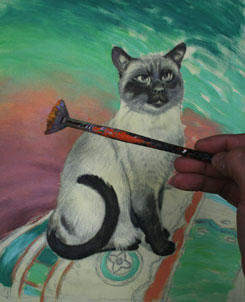
Color BlendingI prepare to blend the backgrounds by using a fan brush. For more softer and subtle effects, eliminate intricacy of brush strokes that steal attention from the overall impact. Tone GradationTone gradation is a technique that I use in my paintings because it classically and smoothly divides the transition of values. It simply defines, as from dark to light gradation. 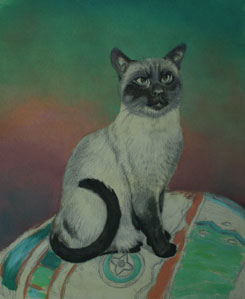
Painting Upside Down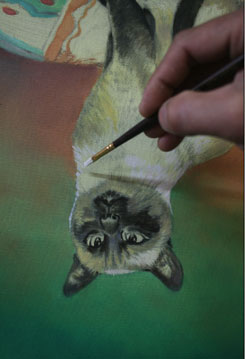
Why invert the painting? Removing the picture image from your eyes allows greater concentration and eliminates developing a series of tones starting from the highest value, the white. Inverting and/or rotating the canvas make strokes easy, allowing for texture and fur directions. Detailing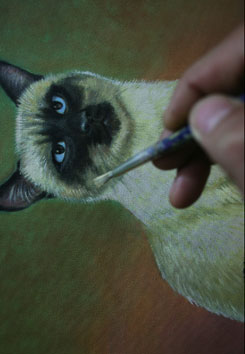
The logic of using brushes is also important. Using big, broad brushes at the start immediately covers the large canvas space. Shifting to medium and very small brushes allows for organizing and improving the speed of your painting process. In this stage, I demonstrate the trick of flattening my round brush to create a chisel mode for my brushstrokes in order to create very tiny lines for fur texture. Continuous glazing of colors gives more depth; and overlapping colors one on top of the colors gives more dimension as you approach the satisfaction of declaring the painting finished. Final StageMy final stage is visualizing subject volumes and impact of highlights. Add some touches; redefine shade and shadows. Let the painting dry, then varnish repeatedly until achieving the desired luminosity. 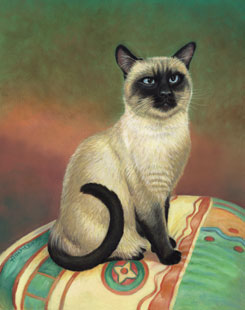
Don’t forget to sign your painting. About the AristRichard Ancheta first began to paint at the age of 12 years old and took painting lessons with well known Filipino artist and illustrators. His devotion and vision as an artist are promising. He studied Multimedia Design at Montreal International Academy of Design. Richard works in various mediums: oil, acrylic, watercolor, pastel and charcoal. His works have been featured in newspapers, magazines and books. He boasts 20 years of experience in painting, illustration, advertising and graphic work. By Richard Ancheta
|
|||||||||||||||||||