DRAWING FOR BEGINNERS |
||||||||||||||||
|
Page 01 / 16
Drawing Book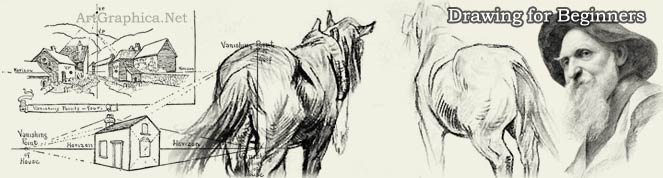 ART FOR BEGINNERS, LEARNING TO DRAWBY DOROTHY FURNISSIntroduction by ArtGraphicaEverybody has to start somewhere, and for the enthusiastic beginner, passionate yet overwhelmed by the enormity of the task in front of them, it is often hard to know where to start. The subject of art is a huge undertaking, and for the self-taught artist, creating a structured approach is far from simple. Many aspiring artists long to delve straight into a medium like watercolous or oil paints, but it is important to begin with a humble pencil, or stick of charcoal as a strong foundation and base in which to grow and evolve. Dorothy Furniss’ drawing book drawing for beginners is a great starting point in which to gain a broad understanding of many of the basic concepts, championing the simplicity of a pencil from the very start, though also discussing other media, such as drawing with a brush (which should appease those wanting to delve into various media associated with painting), and the use of charcoal, which although oftentimes messy, is an extremely useful medium for beginner and experienced artists alike. Drawing for beginners will engage the reader, and get them to attempt drawing many household objects of various textures, shape and design. How does one draw the lightness of a feather, and the hardness of a rock, when using the same pencil on a two dimensional sheet of paper? These practical experiments offer the art student interesting challenges, and immediately engage the brain into a dialogue with itself in a way that allows the student to not only visualise the world around them, but question what it is to actually see. There is a little of a scientist and philosopher in all artists. The drawing book does cover some difficult areas, in fact some of the most challenging any artist may face. Such an example is the chapter on drawing hands which comes early on. Many of the old masters were critiqued by their ability to draw and paint hands as an assessment of their art skills. Students should not judge themselves too harshly, for if you can draw a realistic and well proportioned hand then you have probably spent several years honing your drawing skills already. Feet and faces also provide similar challenges. For the animal lovers, there is a chapter dedicated to drawing animals, with the great, if not obvious, piece of advice that recommends drawing animals when they are at rest! As with previous chapters, Dorothy does encourage the student to consider the anatomy that lies beneath the skin as this ultimately gives wildlife its form. If the art student is despondent with their drawings, it may be prudent to jump ahead to the chapter on art and perspective. There are some great drawing tips to be learn, from how to measure with a pencil, checking lines with a plumbline and basic issues with perspective, demonstrating one, two and three point perspective, showing horizons and vanishing points. Sketching outdoors for the beginner artist is a very positive way of improving our vision, and to continue the philosophy of analysing the visual world around us, in ways that photographs cannot. That is not to imply photographs are bad or do not have their uses, but light, form, depth and edges in nature have a subtlety that cannot be observed by anything other than direct observation. Sketching also forces the art student to work quickly and not worry about trying to finish an entire drawing, and such regular studies lead to swifter and greater development. The very last chapter of the drawing book looks at correcting drawings. As a beginner sometimes the most obvious mistakes are not at all apparent, and can hold us back in improving our proportions. When drawing a portrait, often the eyes get too much attention and appear too large for example. Asking a second opinion can be useful, but perhaps one of the simplest tricks is to take a mirror and look at your drawings in reverse. When working on a piece it is hard to remain objective and to see what you have done with fresh eyes. The mirror gives you a chance to do just that, and any distortions are usually picked up quickly. TO MY FATHER HARRY FURNISS FOREWORDHAVE you heard the reply given by a small boy to a query, " How do you draw ? "" I think," he said, " and then I draw round my think." It is an excellent answer to a very difficult question. Many an artist could not give as lucid a reply. As far as I can judge, and I have been peculiarly fortunate in meeting many artists, the great artist would probably say : " How do I draw ? Here--give me a paint-brush "--and if he were inclined to be brutally frank--" don't ask me fool questions ; watch--this is how it is done." And he would proceed with a few swift strokes to paint something, at which you would gasp and feel no wiser than before. It would look perfect. It would be perfect. But how was it done ? He thought, and then drew round his thought. The great artist speaks with his tools ; more often than not he is a man of few words. We are told that when a Japanese artist wishes to paint a flower he watches its growth from bud to blossom and then to seed. After a little time has elapsed he takes up his brush and paints his remembrance of the flower. Whether he could describe the manner in which he intends to paint that flower is doubtful. We must think with the brush and the pencil ; we must think first and then draw round our ' think.' I hope that this book may help you to arrange your thoughts. It is but a helping hand on the broad highway that leads to the great world of art. D. F. 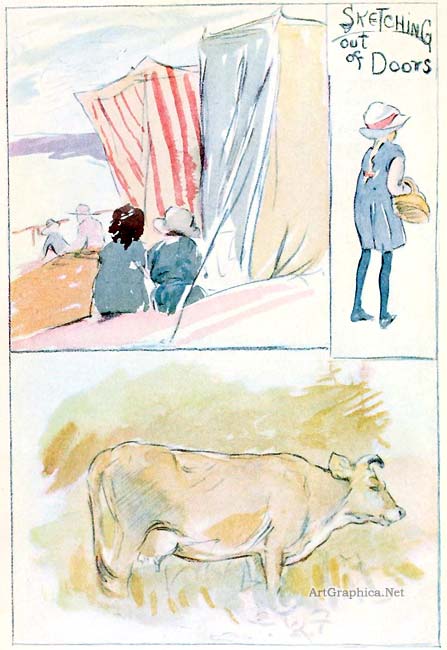 CONTENTSCHAPTER PAGEINTRODUCTION : A FEW TECHNICAL HINTS I. HOW TO BEGIN A DRAWING II. DRAWING TOYS III. DRAWING YOURSELF IV. DRAWING HANDS V. DRAWING FEET VI. DRAWING HEAD, FACE, FEATURES, AND HAIR VII. DRAWING IN PROPORTION VIII. DRAWING INANIMATE THINGS IX. DRAW AN ANIMAL X. COLOR IN ART XI. ART AND PERSPECTIVE XII. SKETCHING IN NATURE XIII. DRAWING WHAT YOU SEE XIV. ART COMPOSITION XV. HOW TO SHADE IN PENCIL XVI. CORRECTING OUR DRAWINGS XVII. MATERIALS INTRODUCTION A Few Technical Hints Drawing with the Lead PencilA PENCIL has many excellent qualities. It is a clean tool and easy to handle. It can be carried in the pocket and pressed into service whenever required. Beyond sharpening, it requires no attention.To sharpen a pencil you should pare the wood in small shavings with a sharp knife. When a small portion of the lead is exposed place the lead on a piece of paper and whittle down to a firm and not very thin point. A very sharp point is a mistake. With such a point we are inclined to dig into the paper, and thus to add to our difficulties when erasing. A thin point, moreover, snaps easily, needs constant sharpening, and therefore leads to much wasting of valuable lead. A word or two about the position of the pencil when drawing. We hold it, of course, as we do the pen, between the thumb and the first two fingers, and half-way up the shaft. There is a modern fashion of holding the pen between the second and third fingers, and whatever may be said for this position in writing nothing could be advanced in its favour for drawing. An overwhelming argument for holding the pencil between the thumb and the first two fingers is this : the hand never tires. I have never heard an artist complain of a tired hand, though his work extended from early morning till late at night ; the reason lies in the perfect balance of the tool in his hand. Take the pencil between the first finger and the thumb and hold it lightly. Is it not perfectly balanced ? Does not the point respond to the slightest motion of the two fingers ? Raise the thumb. If you are holding the pencil correctly, it remains resting against the two fingers and the root of the first finger. The little finger is the pivot of the hand. The hand sweeps round in curves from the tip of the finger with perfect freedom. Practise various touches with your pencil. For light, feathery, gossamer lines hold the pencil lightly and half-way up the shaft ; for rich firm effects hold the pencil firmly and lower on the shaft, rubbing the lead to and fro without removing the point from the paper ; for minute or detailed drawing it will probably be desirable to hold the pencil lower still. A medium HB pencil is generally useful. B or BB for textures, rough-coated animals, etc. A firm-surfaced paper such as cartridge is useful both for pencil and watercolour. A polished card is not advisable, neither is a paper with a rough ' toothed' surface ; the latter is apt to lend a tricky effect which is alluring, but dangerous. It is wiser to employ straightforward methods. Then you know exactly the various stages of your progress. Do not use patent pencils with metal holders or decorated tops. The ordinary plain wooden pencil is the best tool. Drawing with Black ChalkBlack chalk, in the shape of a pencil, is a pleasant medium, but it has one disadvantage, it is very difficult to erase. Therefore the use of chalk necessitates a certain amount of confidence and experience. In other words, do not begin your studies with chalk in preference to lead, but reserve it for your later work.Chalk gives a rich velvety tone and never a greasy shine, the drawback of blacklead. It is delightful for quick sketches, for materials of a coarse or rough texture, for the sketching of animals, buildings, trees, and landscapes. Drawing with White ChalkWhite chalk gives the highest lights, and the paper itself forms the middle tone.I know of nothing more interesting than sketching animals, dogs, rabbits, and goats with these three mediums. White chalk needs very little pointing. It crumbles and breaks with the slightest encouragement, and the small pieces are often useful for sharpening up the edges, or touching in the brightest light. Drawing with Coloured ChalksColoured chalks are very simple mediums. Often the baby begins with a box of coloured chalks as a step toward the colour-box. Drawing with the BrushDrawing with the brush is more difficult than with the pencil, but you should accustom yourself to the use of both.It is far better to paint a picture from the very beginning with a brush. Drawing first with a pencil and then with a brush necessitates changing one's tool, and readjusting one's mind. We look at a model, pencil in hand, very differently from the way we regard the same object when holding a brush. If you accustom yourself to the use of the brush you will soon find it an adaptable tool. Drawing with CharcoalCharcoal is by far the most fascinating, as it is the most difficult medium, therefore it will be wise to keep this for our most advanced studies.But we must bear in mind that no medium takes the place of charcoal. If we shirk its use and adhere obstinately to the pencil we shall lose the freedom that is essential for the development of our art. You will require a small box of Vine charcoal and Michelet paper ; if you intend to use sheets of paper instead of sketchbooks--and this I strongly advise--you must have also a drawing-board on which to pin the paper, and an easel. (Only by standing do we get perfect freedom for the handling of our large drawings.) Charcoal has several irritating qualities. It snaps easily and crumbles, and it rubs away despite spraying with fixative. Nevertheless there is no medium more fascinating and more satisfying. It is equally useful for delicate effects and for those of a bold and vigorous character. Charcoal can be used at arm's length ; it is usually held-- for quick sketching of big subjects--at the end and not at the middle of the shaft like the chalk or lead pencil. It requires very little sharpening and never a point. A flattened side answers the purpose. Rub the stick on sanded paper or shave with a knife, shaving not toward the tip and bearing away, but holding the charcoal in the left hand and along the first finger. Pare the charcoal inwardly with the grain of the wood, for, as you probably know, charcoal is burnt wood. The pith of bread (worked into small pellets) makes a better eraser for charcoal than rubber, though putty rubber is often used. When fixing a charcoal study stand not too near the easel, but a pace or two away, so that the spray falls in a light, even shower over your drawing. When standing too near the liquid falls in blobs and blots the drawing. Next Page: How to Begin a Drawing
|
||||||||||||||||


Online Art Books
Drawing for Beginners Free Art Lessons Free Art Books Art Shop Art Links  
 |
