How to Draw Young ChildrenCarbon and Graphite Portrait Tutorial |
|||||||||||||||||
|
A Merry Christmas Portrait This portrait of Brennan was commissioned by his grandparents as a surprise Christmas present for their son and daughter-in-law. I posted several photos of the portrait on my website as I worked on it...keeping grandma and grandpa involved in the process. I have since added text, to describe the process, turning them into a tutorial. I hope you enjoy seeing the process as well. Studio Notes: The portrait was drawn on Strathmore 100# acid free paper. Additional Supplies used wee Wolff's Carbon Pencils...2, 4, and 6B...STAEDTLER Mars Lumograph Graphite Pencils...f and 2B...chamois and felt square...stump and tortillon...kneaded erasure, BlueTack, and click erasure...small and medium artist brushes...artist tape...and my "carbon farm". Reference Photos... He is a happy infectious child with a twinkle in his eyes, and a beautiful contagious smile...and oh my, that whispy blond hair! I just fell in love with the way those tufts on top fly up. I could tell from the photos that those willful strands of hair moved in the breeze when he ran. After talking with his grandma and discussing how his cowlick seemed to be part of his look at this page...I simply had to choose a photo that would show this. The way the light played in Brennan's hair and the little tufts standing up, the soft shadows on his face, and his "smiling eyes"...all these made for a perfect reference photo. WIP #1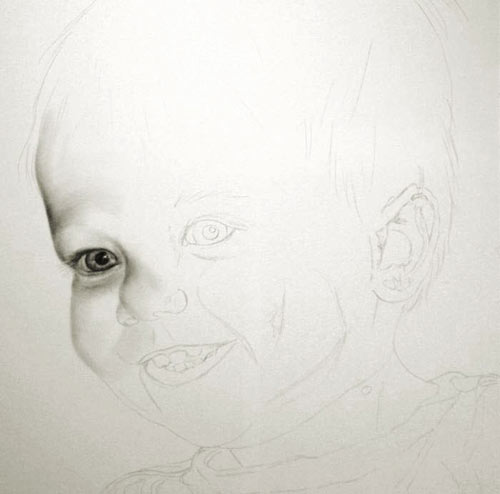 I have just barely begun...but knew Grandma and Grandpa were excited to see the process. As you can tell, I started on the left side of the face with some shading and have done some work on the left eye. I always start on the eyes. I have to get them right before I move on. I used a 4B carbon pencil, applying the carbon directly to the paper...(applying it in the darkest areas of the eye and blending out with a stump.) I then work on the pupil (making sure to leave the highlight)...outline the iris and blend again. The shadows on the forehead were applied with a small square of chamois. The shadows under the eye and on the nose were applied with an artist brush. WIP #2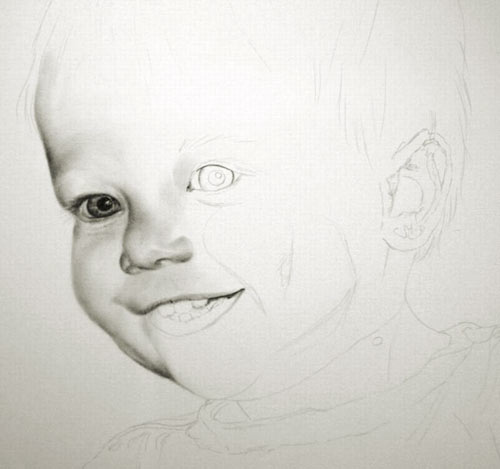
The initial line drawing was done with an F graphite pencil. This is the most important part of the process. Carbon does not allow for mistakes. It takes me a good day, to a day and a half, to complete the precise line drawing. I do the original layout on another piece of paper and transfer it to my good art paper when I am satisfied. I am now about 7 hours into the shading and contouring portion of the drawing. I Have worked to better define the left eye, repeatedly adding and pulling color from the iris until I got it as close to the photo as I could. When you click to expand the drawing you will notice that the eyelashes are beginning to show up on the left side and you can better see first applications of carbon to the right eye. (This perhaps better shows just how I start the eye...laying in the darkest shadow areas first.) I have also added additional tone to the outer edge of the face using a chamois square, worked on the contours of the nose by adding color with a small brush and carefully removed some highlights with a kneaded erasure. I finally started on the mouth...using 6B carbon for the dark shadows (applied directly to the paper with the pencil) and 2H graphite applied with a stomp to start the definition of the teeth. The upper lip was sculptured a little, using a stump coated with carbon. Brennan is starting to emerge! Wip #3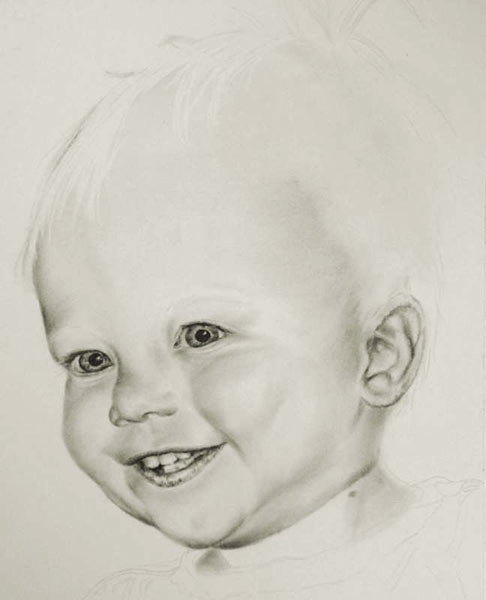
As you can see, I have done quite a bit since my last post. The right eye is finished and the upper lashes are somewhat defined. I've contoured the face using an artist brush and chamois, picking up color from the "carbon farm". I worked on Brennan's ear, adding color with a stump and artist brush. I used a chamois to add a little graphite to the highlight areas of his cheeks and ear...bringing them forward. (To learn more about the natural qualities of the pencils I use, check out my squidoo lens.) The lips have had color added using the point of a stump, and highlights have been pulled out with a kneaded erasure. Brennan's lips have a considerable amount of natural color in them, as most children's do...yet I can't make them as dark as they appear in the photo or his mouth would be all you see. I still have some work here, and the teeth need some attention. WIP#4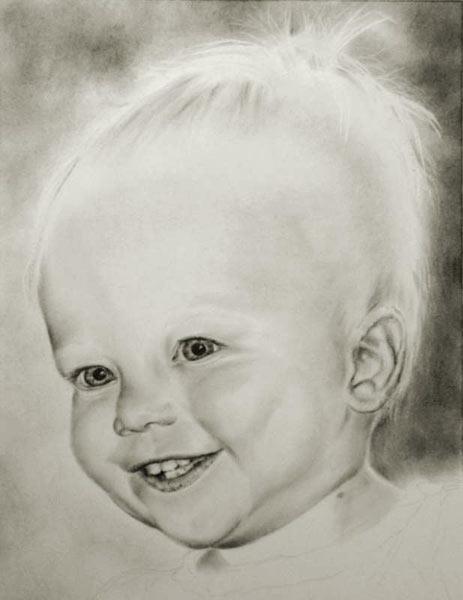
I've used a piece of felt to add color and texture to the background, defining the back of Brennan's head. The blond hair, standing on end, was also defined by the added depth of color. I used a click erasure to, cut to a sharp edge, to pull out a few of the tiny soft hairs on the top of his head. Using an artist brush, I added more subtle shadings to the face, and enhanced the deeper ones with a stump. I have also used a chamois to add a some base tone to his head, indicating where the deeper shadows are. WIP #5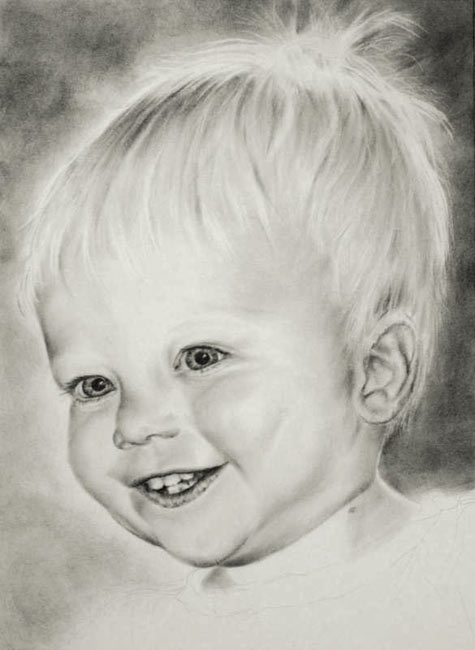
What a difference a head of hair makes! To accurately explain how I draw hair would take a complete tutorial on it's own...perhaps someday I will do just that. But for now, lets just say that in this case, I put color on the paper with with a chamois and then remove "hair like" strands with an erasure, using both a kneaded and click erasure for different effects. I then go back in and add more soft color with a chamois, (sometimes rolling it to a point), and I use a stump to add color in the darker areas. I then begin "pulling hairs" and "highlights" again with the erasures. I repeat this process over and over and over until I have the look I want. The secret is to remember that "hair is not just groups of lines"...you have to train your eye to see light and shadow. You will notice there has again been more contouring done to the face, and I've added more graphite to the center of each tooth, bringing it forward, and added carbon to the shadow area between each tooth, making the sides of the tooth recede. Finished Portrait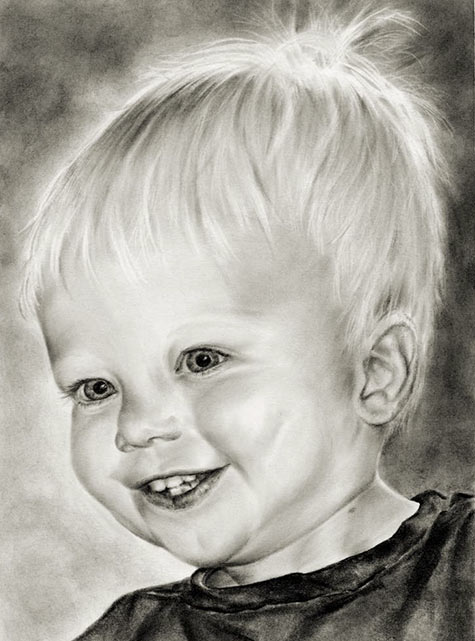
Since my post I have worked extensively on the hair, continuing the process mentioned above....added more shading to the forehead with a chamois, toned down the teeth, and the most obvious, Brennan is now wearing a shirt. I'm very pleased with the finished portrait. Please realize, with drawing, it's all about the detail...and it's the subtle details that makes the difference. There is just no way for them to show up here on the computer screen. It's a shame. The WIP pictures were taken with a camera, while the last one is the result of a high resolution scan...quite a difference. I did the scan so the grandparents could have a print. Visit Marsha Robinett's Website Tutorial is copyright of Marsha Robinett
|
|||||||||||||||||
Drawing Lessons
Site Navigation |
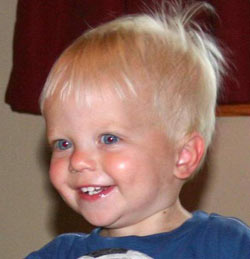
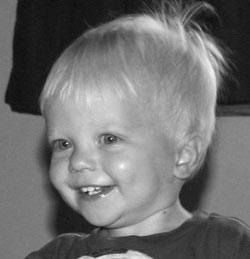 These are both the color and back and white photo references used for the finished layout. Brennan's grandmother provided some of the best photo references that I have ever had to work from. There were so many good ones that it made choosing just one quite difficult. Having so many however allowed me to acquire a wonderful understanding of Brennan's personality.


