John Lovett Watercolor Lesson |
|
||||||||||||||||
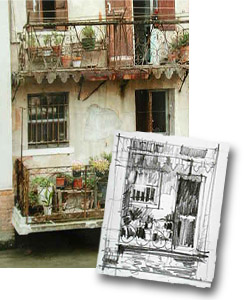
Our subject for this demonstration is the weathered facade of on old building in Treviso, Italy. Rather than relying solely on watercolor, we will build up a texture echoing that of the building using rice paper and gesso. This combined with transparent watercolor, ink and pastel pencil will allow us to instill the mysterious atmosphere the subject evokes. 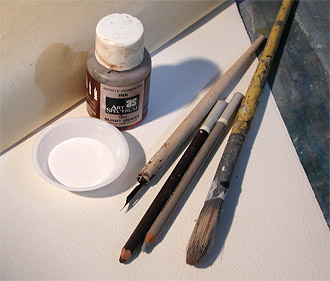
MATERIALS Watercolor - Ultramarine, Burnt Sienna, Quinacridone Gold, Alizarin, Scarlet Lake and Phthalo Blue. Brushes - 1" and 1/4" flat and #2 liner Burnt Sienna Ink, pen and spray bottle of water Japanese Rice paper and PVA Glue Brown and Gray Pastel Pencil Gesso 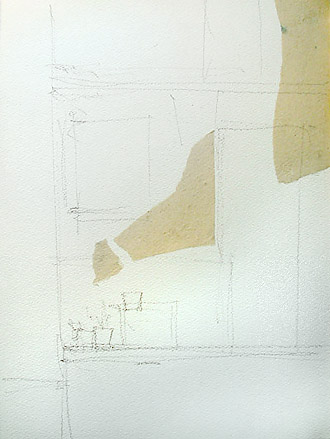
Step 1 - Rice Paper and DrawingApply your rice paper with slightly diluted PVA Glue. Vary the Shape and Size of the pieces and use an odd number. 3 or 5 seem to work best. They need not correspond to any particular part of the subject, but place them on the paper to form an interesting pattern. Use your Gray Pastel Pencil to draw in the main shapes - don't be too concerned with detail. At each stage of the painting try to keep a balanced, finished look to your work - view it as a complete composition rather than anything to do with the subject. 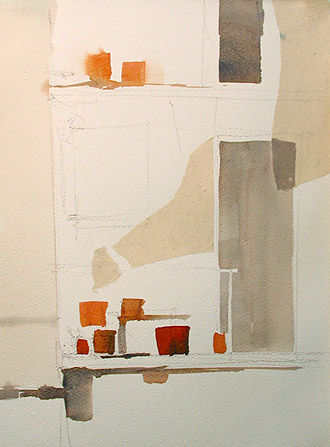
Step 2 - First WashesA warm wash of Quinacridone Gold and Burnt Sienna down the left hand side repeats the colour of the Rice Paper. The same mixture is intensified and strengthened with some Alizarin to paint the Terracotta pots (vary the mixture slightly from pot to pot to keep it interesting). Adding some Ultramarine to the mixture will produce the neutral gray for the door and window opening. 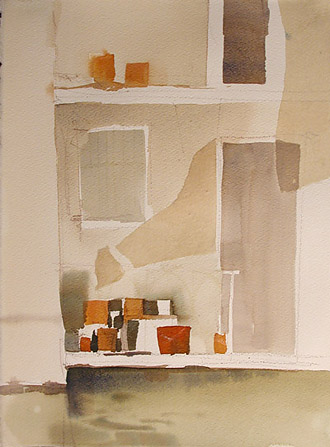
Step 3 - Adjusting SurfacesQuinacridone Gold, Burnt Sienna and a small amount of Ultramarine give us the warm brown/gray to wash over the inner wall surfaces, pushing them back into the painting. These can be varied slightly in tone - a little darker under the top balcony and around the foreground pots. Stirring a tiny bit of Phthalo Blue into this mixture will give you the color for the water at the bottom. While this wash is still wet a slightly darker mix can be dropped in to suggest reflections. 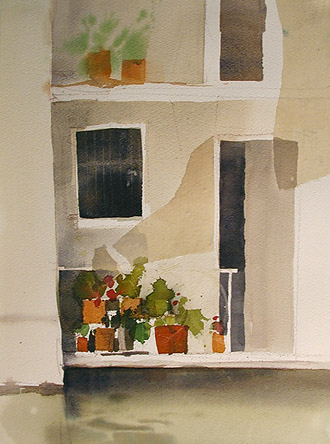
Step 4 - Add some DarksA dark strip for the open door and a dark rectangular window give the design a bit more strength. The areas of shadow are also strengthened at this stage. Introducing some strong green foliage (Quinacridone Gold, Burnt Sienna and Phthalo Blue) puts a little more life into the painting. Apply the foliage very roughly and loosely and vary the color and tone slightly. Once the foliage dries, splash on some pure alizarin to suggest flowers. 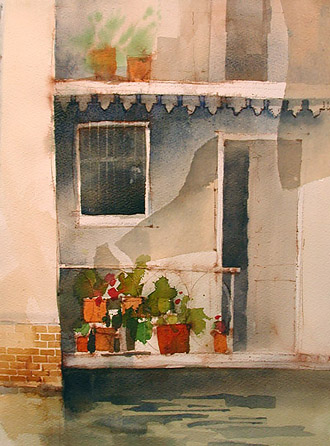
Step 5 - More Color and DetailBurnt Sienna and Quinacridone gold bricks are added to the left hand wall with the 1/4" flat brush The scalloped decoration can be drawn in with your brown pastel pencil and cut around with a wash of cool dark gray (Ultramarine Blue and Burnt Sienna). Splash some more red (I used Scarlet lake) into the area of the flowers then let everything dry. Use your pen and Ink to draw some fine lines around some of the details. As you apply the ink, quickly spray it with a fine mist of water to keep it from becoming too hard and sharp. 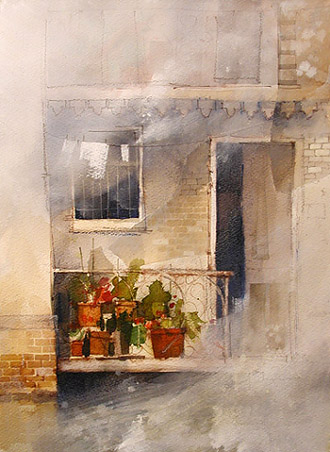
Step 6 - Attack with GessoBy this stage your painting should be starting to look fairly interesting. Here the easy option would be to tidy up a few details and call it finished; however, fracturing the surface and obliterating some of the detail will give the work much more mystery and interest. The Gesso is applied with an old 2" bristle brush. The idea is to break up some of the strong lines and allow a small, focused area of detail to emerge. I chose to push the top left and bottom right hand corners back allowing a diagonal band of detail to dominate. The Gesso is applied straight from the tin then broken down gradually with a clean wet 2" brush. Once dry the liner brush and gray pastel pencil can be used to coax just a little detail from the lost areas. The contrast between these loosely drawn areas and the band of detail make the work much more interesting and leave the viewer to mentally fill in what has been left out. By John Lovett
|
|||||||||||||||||