Celebrity portrait art demoCelebrity Portrait Art Tutorial - Bette Midler |
|||||||||||||
Wetcanvas Guest Lecture by Gail Yarbrough
OverviewReference Photo  Step OneI've chosen to draw Bette Midler for this tutorial because I admire her as an actress and singer. I always choose celebrities whom I like and whose features I am very familiar with. I go by the photo but I also go by my knowledge of the celebrity. If I know their face very well, I can better capture their particular "look" even if the reference photo I've chosen is a bit unclear. In step one, before doing any outlining of her, I have given the paper (Bristol Smooth), one light layer of graphite then blended it out with tissue. Then I outlined her face, hair and hand. I'm using a Derwent Pencil "b" for this. Some people outline using various methods. I prefer to do everything free hand but you should use whatever method you feel most comfortable with. In art, there is no right way or wrong way, only the way that's best for you!  Step TwoIn step two, I've added a second light layer of graphite to her face, neck, and hand, then blended it out with a tissue. I use tissues when I want to remove most of the graphite I have applied, leaving just a light shading. When I want to blend but leave most of the graphite in place, I use a tortillion. After this was done, I then darkened the background around her, using a 9b pencil. This will make her hair really pop out. I then blended this out with a tortillion.  Step ThreeIn this step, I focused on getting her hair prepped for highlights. I gave her hair another light layer of graphite then blended it out with tissue. Then I went back in and darkened up some areas, such as the roots and places where some of the curls created shadows. I then blended this out with a tortillion. Some of these shaded areas no doubt will be altered in some fashion once I begin adding highlights. But that's o.k. since a portrait is an ever evolving thing until the last pencil has made its stroke. At this point, my main purpose is to just create an outline or guide as to where the highlights should be placed. In this step, I also shaded under her chin a bit, defined her hand some more, and then used a 9b pencil to darken her blouse.  Step FourI have given Bette a second layer of graphite to her face, as she was looking a bit pale, then blended it out with tissue. Most of her hair is done. I used a kneaded eraser to take out the bigger highlights and an eraser stick to create fine strands. As you can see, some parts of the hair are not exact to the reference photo. When I draw celebs, not commissioned work, I prefer to have the freedom to change the hair a bit if I think it will add to the portrait. However, when it comes to facial features, I use no such creative license! In this step, I have also added some more definition and shading under her neck. And I've created some highlights on her forehead. Once I got the hair pretty much in place, I went back in and darkened up the background with a "9b" pencil. You may be curious as to why there are tiny white squares at the corners of the paper. I tape my paper to a piece of cardboard when I work on it and naturally, graphite won't go over tape so the white paper shows underneath. Naturally I'll fill it in once finished. Let me add here, that I tape my paper to cardboard in order to stand it upright against something. I find the upright angle better enables me to accurately draw features as opposed to having the portrait flat. I work on my portraits much like a painter works on a canvas!  Step FiveIn this step, I've completed her eyes, most of the nose and most of the mouth. When doing eyes, it's important to put the highlights in the right place. If one of the highlights is higher or lower than the other, it will throw the whole eyes off. I prefer to build the pupil around a circle that is to be the highlight instead of drawing a solid pupil then lifting out a highlight with an eraser. This way the highlight is whiter. Also, eyes turn out well if you don't make a definite line under the eye. Always blend out with a tortillion.  Step SixI had to make some adjustments on her nose, right side of her face, mouth and jaw. I think everything is now where it should be. I've given her face some more shading and contour and have re-worked her lips a bit. I've also smoothed out her hair with a tissue and added a few more darks.  Step SevenIn this last step, I've created the dimple on the right side of her mouth, have added some highlights to her lips then smoothed them out. I also went back and darkened up her eyes a bit more. Then I smoothed everything over again with a tissue. I try and use good quality tissues that are very soft, they go over better on the paper. 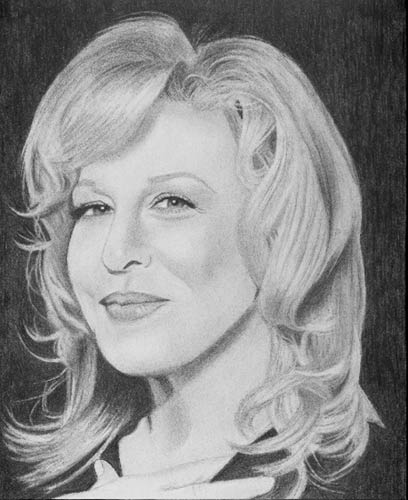 Well, I think she's done! The most important thing to remember when drawing your favorite celebrity is to think about the many times you've seen them in photos and movies. Try to capture the essence of them, what they are most known for, whether it's their big smile, twinkling eyes, or quiet confidence. Happy drawing! 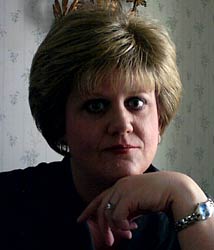
Gail Yarbrough - Artist's Bio I'm 46 years old and have one sixteen year old daughter. I grew up in Southern California but now reside in Texas. I have loved drawing my whole life but never knew I had any artistic ability until about two years ago. It was then that I purchased a Lee Hammond book on how to draw portraits. With every portrait I draw, I learn something new. Aside from art, I also love writing and poetry and have had my poetry published. I hope to finish a novel of suspense that I began some while ago and maybe someday, it will be published as well. I also love music and in the seventies, was a drummer for a few years in a country and western band, which I loved very much. I can also play the piano by ear. My other hobbies and interests include movies, cooking and singing karaoke (much to the howling of wolves nearby). Article, Copyright Gail Yarbrough, 2005
|
|||||||||||||


