Free Art LessonAn Afternoon's Study After Joseph Mallard William Turner |
|||||||||||||||||
Pencil study after Turner, 2005, Part 1 of 2The Great Falls of the Reichenbach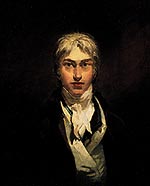
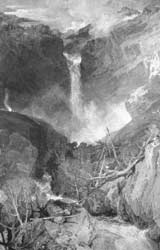
William Turner The original watercolour of the Reichenbach waterfall in Switzerland was painted by J.M.W. Turner (shown on the left) in 1804, measuring a large 40 3/4" by 27 1/2". Turner was a British artist well known for his mastery off light and atmosphere using some innovative and unorthodox techniques that sometimes crossed over into abstraction. It is this dreamlike use of texture and imagination that inspired the following afternoon's study. Needless to say, watercolour and pencil are very dissimilar mediums, and so the challenge here was to try and create some of the texture along with the ethereal ambience on a much smaller scale. Mountain Beauty
I have an old 1906 copy of John Ruskin's Modern Painters (Volume IV, of Mountain Beauty) which is full of intricate plates, descriptions and indepth analysis of mountain and rock formations, much of it championing Turner as an artist, and much of it based upon the work of William Turner whom Ruskin so greatly admired. I would recommend this book to anyone who wants to take such mountain and rock studies to much greater depths. My own study was done on cheap stationary sketch paper, in an afternoon, hastened by spontaneous rapid techniques lending to a slightly loose appearance. The overall size of the study measures 8.5" by 6" using , for the most part, conventional pencils sharpened to a point so that small details wouldn't be entirely lost. 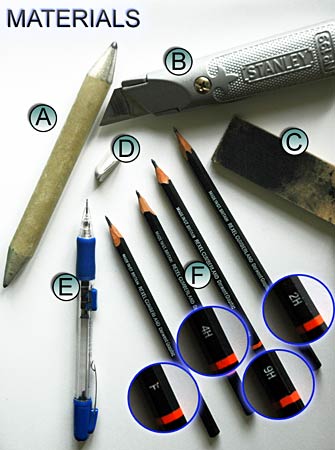
A. Blending stump - used in the earlier stages for the quick build up of tones. (As I know these tools are not always readily available in all countries, a piece of tissue paper will suffice just as well) B. Stanley knife, for sharpening pencils. C. Sandpaper for maintaining a sharp pencil point. D. Conventional Eraser, cut with knife to lend a sharp edge. E. Pentel 0.5mm mechanical pencil with 2B refills F. Derwent drawing pencils, F, 2H, 4H and 9H Pencils: The mechanical pencil was only used later in the drawing for some of the darker areas. Although it doesn't require sharpening, the point on the conventional pencils is better for detailing and these were used throughout the majority of the study. By far the best, and less wasteful method of keeping your pencils sharp is with some form of craft knife. Always cut away from yourself if you value your hands (most artist's treasure them!) and if necessary sharpen it on a piece of sandpaper with a twisting motion. If your sandpaper ends up as well used as my own, wipe the pencil point on a piece of tissue before letting it touch the paper to avoid any overly dark marks. 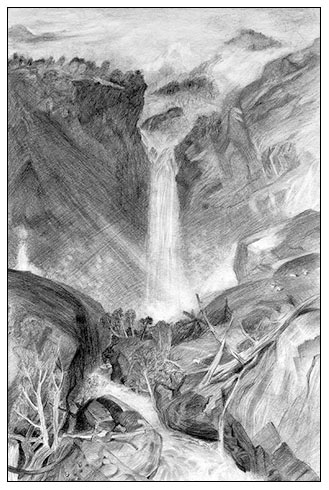
Before Starting
Before you commence on any drawing make sure you can visualise in your own mind what it is you want to achieve and how you might go about it. That's not to say you will be able to achieve it, but if you rush in without a relatively clear vision you will nearly always be doomed to failure. Take a moment to study your source. In portraiture artwork it pays to strive for a good degree of accuracy. Landscape is far more forgiving; a few misplaced rocks or tree limbs will not grab anybody's unwanted attention. Try to mentally envision the source as an abstract tonal map; establish the darkest areas, the lightest areas and simplify areas between the two extremes. The best means for doing this is to squint which has the effect of reducing values and detail. Also note edges between those that are hard and those that are soft. Turner's dreamlike qualities stem from an abundance of soft edges, some of the sharper areas can be seen in the small contrasting goats and fallen branches in the foreground. 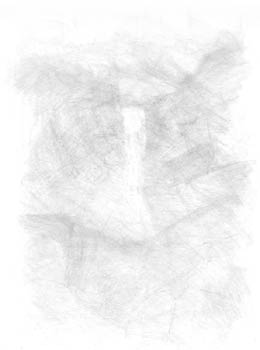
1. AbstractionThere's no right or wrong approach to drawing, and many ways in which a drawing can be started. To return to the visualisation stage; my own vision led to a picture of Turner almost attacking the paper with scratches and marks where abstraction was refined until it built up into something more definable, and this vision (whether correct or not) led to my approach. Gripping the pencil loosely near to the top I ran it over the paper at a low angle and scribbled in random directions before taking the blending stump and blending the graphite across the paper in such a way as to establish the basic composition - sky, background and foreground. The eraser was pulled down the page to establish the placement of the waterfall. 2. Refining the Composition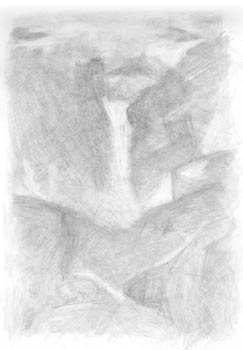
The next stage mirrors the first. My main interest is to kill the white of the paper so I can start to build up tone. As we are not going in with the dark values prematurely there's still a lot of opportunity to change, add and move things about with the minimal of fuss. A little more tone is lifted out to represent the spray from the waterfall, and I've also roughly placed the main fallen tree and foreground water with more lifting from the eraser - none of it is accurate but it helps the visualisation process. Some of the strokes are not quite so random in their application and follow some of the forms of the rock formations, and when I blend these I blend in the direction of the rocks. 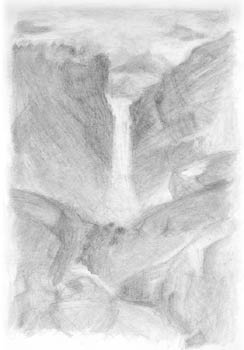
3. Formalising the CompositionThe third stage is to basically nail the composition. That's not say things could not be transposed, but I want to be content before I start rendering some finer details knowing I will not have to go back and make corrections. Again there should be less randomness in the direction of the strokes. If you study the source you should be able to pick up on a sense of pattern and movement. The background rock faces pull into one another drawing the eye straight to the focus of the waterfall. This then leads us down to the lower portion of the drawing where the water escapes, and yet the upward pushing trees and boulders prevent the gaze from being taken from the artwork altogether, and pushes us back towards the centre of interest. 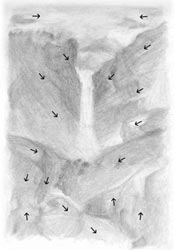
We are now in a position where we have a basic (albeit light) set of values providing a base from which to build up the study with slightly more carefully positioned strokes. Having this basic tonal map established will make the next steps that much easier. The tutorial continues on the next page - please click on the button below. Click to View PART TWO of the JMW TURNER Drawing Study art lesson
|
|||||||||||||||||
