Wildlife Art Lesson |
|||||||||||||||||
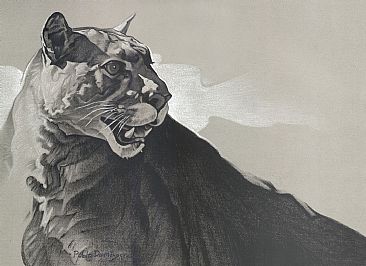
Drawing a Puma in CharcoalIntroductionCougars (also referred to as puma, panthers or mountain lions) are the heaviest cats following the jaguar and masterful predators capable of taking on animals much greater in size, although they will also eat insects. Sadly, hunting has caused drops in numbers through hunting and loss of habitat. The following charcoal drawing has been created by artist Pablo Domingquez, from Michigan. Pablo started drawing as a very young child of four, his education is largely self-taught but also consisted of informal teachings from different teachers and schools such as the Beartooth School of Art in Montana. He often visits zoos and wildlife sanctuaries to observe and sketch animals, although this art tutorial is carried out from a photograph (as shown below). In this demonstration, Pablo uses compressed charcoal, which unlike its vine charcoal equivalent is less forgiving of mistakes. A lot of time is spent on the preparatory drawing, as once this is down correctly the focus of the study becomes one of values. White charcoal is used very sparingly and only at the end. Drawing, step 1 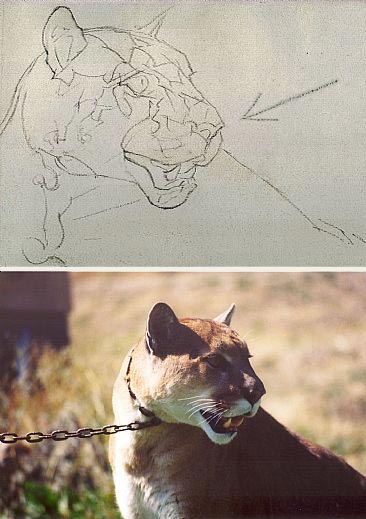
Presented here is a drawing demo. The story so far: I am working upright on an easel. The drawing surface is a sheet of tinted charcoal paper taped to a sturdy board with a thick sheet of paper sandwiched between the two (to provide some cushion). Several sticks of compressed charcoal (from 2-4 inches long), a white pastel stick, Paper stumps, a single edge razor, and a kneadable eraser are the tools. The image here has been laid out, but I feel the proportion is off on the length of the cougar's nose/muzzle, I feel it's bridge is too long. In the past I may have let it be, but investing hours in a drawing that is based on faulty proportion is not a happy feeling once the piece is completed and the mistake is more evident. Drawing, step 2
The nose/muzzle has been re-drawn to the proper size befitting of a cougar. This line drawning essentially lays out landmark spots I have selected. I am working in charcoal here, and this is one of 2 ways I initially approach a drawing when using the medium (I will demonstrate the other sometime in the future). Drawing, step 3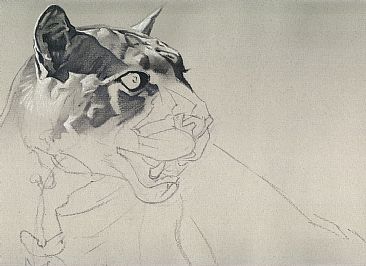
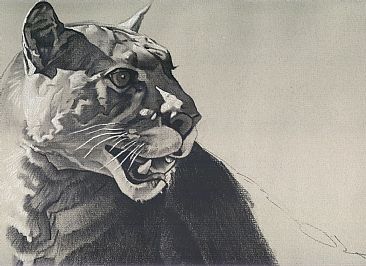
Starting in the upper left section, I begin the shading process. I look for the larger, darker areas first. Rubbing my fingers on the paper to smear the charcoal helps to create shaded areas. I (carefully!) sharpen 2 or 3 charcoal sticks with a single edge razor to draw thin fine lines needed. Otherwise a dull stick is used for thick lines and shading while a stick laid horizontal on the paper is also used for shading larger areas. The kneadable eraser is invaluable when working with charcoal, and I use it to create shapes and highlights. Of course the white pastel stick is reserved for the brightest highlights and I try to employ it sparingly. Drawing, step 4
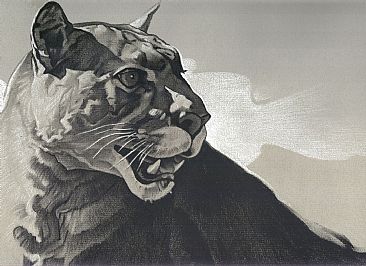
There is roughly 2-3 hours of work represented in each step illustrated. I pay close attention to my reference photo, but take liberties with things like line and contrast. Drawing, step 5
|
|||||||||||||||||
ART LESSONS ONLINE |
|||
| PENCIL LESSON Child |
WATERCOLOR ART Birch Trees |
OIL PAINTING Ocean Surf |
|
 |
 |
 |
|
| PASTEL LESSONS Dog |
CHARCOAL LESSONS Female Nude |
CHARCOAL LESSON Nietzsche |
|
 |
 |
 |
|